Canning vegetables and other items is one of the easiest and best ways of preserving vegetables. This will ensure you have lots of yummy and nutritious vegetable to consume all year round.
When you start preserving food at home, it allows you to have an abundant supply of a wide range of food items. This is terrific for when fresh produce is seasonal and might not be readily available in stores.
Preserving food at home also allows you to enjoy the fresh bounty of your favorite summer items all throughout the year. This is especially true with vegetables grown in your own garden.
Your home harvest is always best served straight from the garden, however, we all know that there is only so much zucchini or cucumber you can eat over one summer. So, instead of giving them away to friends and neighbors, or adding them to your compost, why not use quality home preserving equipment and try your hand at canning vegetables.
Beware, vegetables that are not preserved with the right research-based canning mechanisms could pose a major health risk. It is important that you use the correct method when you are canning vegetables at home.
As most vegetables are low-acid foods, the safest method for canning vegetables will be pressure canning. This is the only method that will destroy not only bacteria and fungus, but also their spores.
The exception to this is tomatoes – which are high in acid. These are best processed in a water bath canner.
Quick Content Navigation
What is “Clostridium botulinum?”
When looking to canning vegetables at home, pressure canning turns out to be the most reliable and the safest option. This is because a lot of vegetables tend to be low-acid items.
Therefore, they must be processed in a proper pressure canner, using the right heat and pressure to deliver quality food that is safe to consume.
If low-acid vegetables are not canned properly, it could lead to the development of deadly, foodborne illness, “Botulism”.
Clostridium botulinum is a specific bacterial variant that is responsible for the process of “botulism food poisoning” in vegetables and meats.
When processing meat and most vegetables, it is important to ensure the temperature is high enough to kill the botulism spores.

This only occurs at temperatures of around 240 F degrees which is only achievable in specialized home preserving equipment.
The other factor for safely canning vegetables is that they must also be processed for a certain duration and under pressure. These factors are only achieved in a specialised pressure canner for home.
Precautions To Note When Canning Vegetables At Home
The USDA has methods and recommendations when canning vegetables at home. The complete canning guide is 196 pages but is broken down into easy-to-find sections.
Here we list the relevant points when canning vegetables for preserving food at home.
- Canned vegetables (low-acid) and tomatoes (high acid) not processed correctly, present a risk of botulism.
- If in any doubt of the processing method, boil the food before consuming to prevent botulism. Boil for 10 minutes at or below 1,000 feet and add an extra minute for each 1,000 feet of elevation.
- Wash all fresh produce thoroughly before processing.
- Peel root and underground stem crops to reduce bacteria, fungus, molds and spores.
- Ensure all canning jars, lids and tools are properly sterilized before using.
- Use the correct canning method when canning vegetables at home. Low-acid vegetables need to be processed in a pressure canner. Tomatoes, which are high in acid, should be processed in a water bath canner.
Using a Top-Quality Pressure Canner for Canning Vegetables at Home
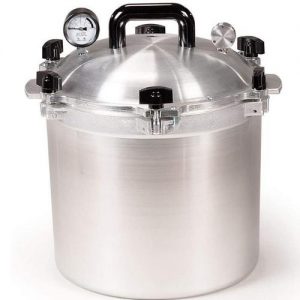
A typical pressure canner is a heavyweight kitchen appliance and a unique piece of home preserving equipment.
They are constructed of high-grade steel or aluminum and feature a secure-locking lid with pressure and temperature gauges and release valves. These ensure the correct metrics are achieved within the appliance to allow safe canning of vegetables at home.
In addition, a weighted gauge or a precise pressure gauge, and a clear exhaust vent (also referred to as the petcock).
Features of a Pressure Canner include:
- Large capacity of 20 – 25 quarts.
- Uses steam and high pressure to safely process low-acid foods.
- Rack or sieve plate which sits on the bottom of the canner. This keeps the canning jars off the bottom to reduce breakage and allows steam to circulate within the canner.
- A secure, locking lid – usually with cool-touch handles.
- Pressure regulators, a pressure gauge, and release valves. These are usually in the lid but may also be in the body in some machines.
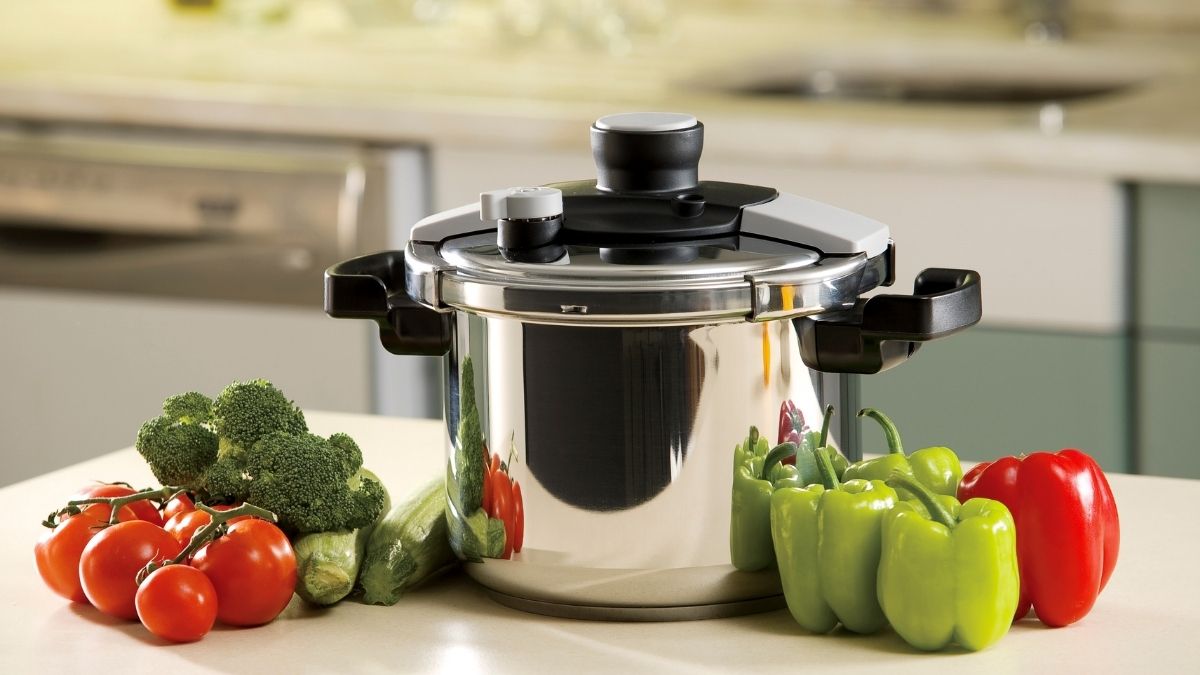
USDA standards don’t recommend using a pressure cooker when canning vegetables. This is because pressure cookers are often too small to hold canning jars above 4 quarts. They also cannot accurately measure temperature and pressure which is required to safely can vegetables at home.
Preparing Vegetables For Canning
For the best outcome it is recommended to choose only tender, young and fresh vegetables for canning. Also, it is best when canning vegetables to begin as soon as you can.
Our home food preserving experts like to begin the canning process within minutes of harvest to get the best results. A rule of thumb is to ensure your vegetables are ready for canning within 2-3 hours of picking.
This will give you the best flavor and make sure that the vegetables retain all their nutrients when processing. Nobody wants to open a jar of beans or carrots to find them limp and tasteless.
How To Prepare Vegetables For Canning
- Sort the vegetables and remove any with bruises or blemishes – these will not can well. They may even introduce bacterial spores into the batch. If you do not have enough for a full batch, make sure that you cut ALL blemishes out.
- Wash your vegetables thoroughly – you must remove any grit or dirt. We suggest doing this in batches and changing the water regularly. Keep the dirty water to put back on the garden to retain as much soil as possible. You can use a soft cloth or brush on hardier vegetables if required, but, be careful not to “bruise” them.
- Rinse thoroughly.
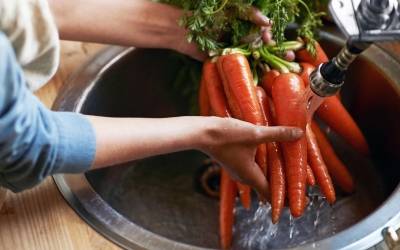
- DO NOT soak vegetables before canning as it will cause them to leach both nutrients and flavor.
- Once clean, lay them out on a clean cloth to dry.
- Prepare your vegetables for canning by peeling, slicing, de-ending (as in beans) or whatever way you wish to preserve them.
While you are preparing your vegetables for canning, have a large pot on the stove and add the lids and jars you will be using. Place them in warm water on a rack in the pot ensuring that the whole jar is immersed.
Bring the pot to the boil and leave it to boil for at least 10 minutes to sterilize them. Add 1 minute of boil time for every 1,000 ft. above sea level.
Finally, if you are unable to begin canning your vegetables within 2-3 hours of harvesting, use this tip to keep them fresh for processing later. Follow the first 5 steps above and, once dry, store them in the refrigerator for a couple of days. The cold and dark conditions will ensure they retain flavor and nutrients.
We don’t recommend storing them for more than a couple of days.
Useful Equipment For Canning Vegetables At Home
To make sure that the process of canning vegetables at home runs smoothly, here is a list of essential items to have on hand.
- Clean and sharp knives
- Cutting boards
- Fresh towels and cloths
- Spatulas
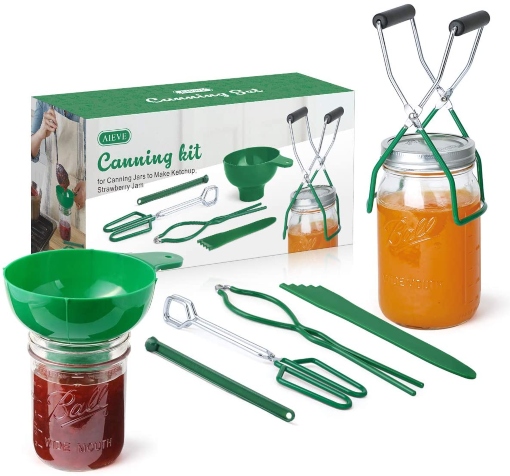
- Funnels – wide-mouthed and narrow, depending on the jar used
- Bubble remover/measurer
- Plastic-handled tongs
- Magnetic lid lifter
- Canning rack – to place in the canner & prevent jar breakage
- Jar lifter – for removing the hot jars
- Jar wrench – to ensure lids are tightly fitted
- Clock or timer
- Fresh oven mitts – for handling hot jars
- Cooling racks
How To Pack The Jars When Canning Vegetables
Most vegetables can be processed using either the raw pack or the hot pack method. However, some, such as potatoes, beans, creamed corn, beets, pumpkin, and mushrooms can only be preserved using the hot pack method.
So, what is the difference between raw packed and hot packed, and how do you do it?
Hot Pack Method
When hot packing vegetables, they are placed in boiling water at various times, depending on the vegetable type. This will vary from a few minutes for light vegetables, such as asparagus, to almost 30 minutes for whole beets.
See our table below for exact times and processes.
Boiling vegetables before canning not only destroy bacteria, it shrinks the vegetable and stops the action of enzymes. Shrinkage occurs because some vegetables are 10 – 30 % air.
Do this in batches to ensure the water is boiling continuously for the freshest results. Also, it is important to make sure all vegetables are immersed fully for even processing.
When canning vegetables at home, you can then use the same water to fill the jars packed with your vegetables.
Raw Pack Method
In this method, fresh and raw vegetables are packed into canning jars after being properly cleaned and prepared.
As there may be some shrinkage during processing in a pressure canner, it is important to pack raw vegetables tightly. Of course, you need to allow enough space for liquid to fit inside the jar when canning vegetables using this method.
Place the jars into warm water only as adding them to boiling water may cause the jars to crack.
If you are in any doubt about which method to use, always choose to hot pack your vegetables. This will ensure that any bacteria are destroyed.
Also, because more air has been removed before canning your vegetables and processing, they will stay fresh longer than those that have been cold/raw packed.
Using a Pressure Canner
With the exception of tomatoes, all vegetables need to be processed in a specialized pressure canner. Follow the manufacturers instructions to ensure safe usage of your canner.
Place the properly filled & closed canning jars on the canning rack using a jar lifter or secure tongs.
The canner lid is then closed securely, leaving the petcock and vents open.
Heat the pressure canner at its highest setting until steam is flowing freely from the vents. Maintain this for around 10 minutes, then close the petcock to allow steam to build within the canner.
The canning process can be timed when weighted or dial gauge indicates the desired pressure has been achieved.
Once completed, remove the canner from its heat source and switch off. Set the canner aside to cool naturally and de-pressurize. DO NOT try and speed this cooling process as that may cause seal failure.
Once the pressure gauge shows zero, you can remove the weight or open the petcock. Leave the canner sit for 10 minutes, and use oven mitts for removing the lid.
This is where your jar lifter comes in as the glass jars and metal lids are boiling hot. Take care not to tilt the jars to avoid spilling.
Use a cooling rack or clean towels to place your canned vegetables to cool and remember to listen for the “pop” as the lid seals.
Let the jars sit for 12-24 hours, then test the seals. If the lids haven’t sealed properly, check both the jar and lid for defects, change 1 or both and re-process straight away.
Checking The Seals And Storing
As the jars cool down, you should hear the famous “pop” sound.
Also, check that the center of the lid is curved inward. This shows that the pressure inside the jar has created a good seal.
Push down over the center of the lid. Any movement up and down means that the seal has failed and your canned vegetables will spoil.
Once the jars are fully cooled, remove the ring bands, leaving just the lid and jar. It is advised to not store the jars with the ring bands on.
Wipe the lids and jars with a clean cloth, and label them with the contents and date. Store them in a cool, dark and dry place until you are ready to use.
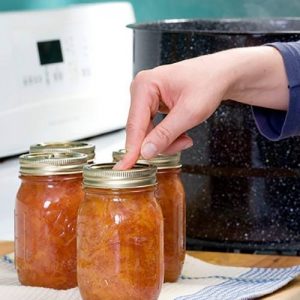
Canning Vegetables at Home In A Pressure Canner
| Vegetable | Preparation | Pack Method | Processing Time In Minutes Quarts | Processing Time In Minutes Pints |
| Asparagus | Can be whole or cut in pieces. Use young spears around 4-6 inches long. Remove tough stems. | Hot Pack: Boil 2-3 minutes before packing in jars. Add boiling water leaving a 1″ headspace. Cold Pack: Fill jars tightly with raw asparagus. Cover with boiling water leaving a 1″ headspace. | 40 | 30 |
| Beans (Italian, snap or green) | Wash, trim ends and remove strings. Cut into 1″ pieces or leave whole) | Hot pack: Boil for 5 minutes. Loosely pack into jars leaving 1″ headspace. Cold Pack: Tightly fill jars with beans then add boiling water. Leave 1″ headspace. | 25 | 20 |
| Beets (sliced, cubed or whole) | Leave stem root & 1″ of tops to reduce loss of color. Wash thoroughly. | Hot pack only: Slice to 1/2″, cube, halve or leave baby beets whole. Boil for 15-20 minutes, or until skin easily slides off. | 35 | 30 |
| Carrots (diced or sliced) | Wash, peel and dice or slice larger ones. Baby carrots can be canned whole. | Hot pack: Simmer in boiling water for 5 minutes. Pack loosely into jars leaving 1″ headspace. Cold Pack: Pack tightly into jars leaving 1″ headspace. Cover with boiling water. | 30 | 25 |
| Corn (creamed) | Remove husk and silk. Wash. Blanch for 4 minutes. Remove kernels with a knife and scrape all pieces. | Hot Pack Only: Add all corn pieces to a saucepan with 2 cups of water. Heat till boiling then add to pint jars. | Not recommended | 85 |
| Corn (full kernel) | Husk and remove silk, then wash. Blanch for 3 minutes and remove whole kernels. | Hot pack: Add 1 cup of water to each quart of corn kernels. Simmer for 5 minutes then fill jars with kernels and liquid. Cold Pack: Tightly pack kernels into jars. Add boiling water while leaving 1″ headspace. | 85 | 55 |
| Greens (spinach, broccoli). These are better preserved by blanching and freezing. | Wash thoroughly. Sort and remove any pieces with blemishes. Discard stems. | Hot Pack Only: In batches, steam for 3-5 minutes, or until just wilted. Loosely fill jars and add boiling water. | 90 | 70 |
| Mushrooms | Use only top-quality, small-to-medium-sized mushrooms featuring shorter stems. Small ones can be canned whole but larger mushrooms need to be sliced. | Hot pack: In a saucepan, add mushrooms and cover with water. Bring to the boil and simmer for 5 minutes. It is recommended to add ascorbic acid to the jar before processing. This will prevent discoloring. | Not recommended | 35 |
| Peas | Use only young pods where the seeds are young and sweet. Shell. | Hot Pack: Boil for 2 minutes. Add to canning jars and fill with boiling water, leaving a 1″ headspace. Cold Pack: Leaving a 1″ headspace, pack peas into canning jars and add boiling water. | 40 | 40 |
| Potatoes (white) | Wash thoroughly and remove any blemishes. Cube or slice into 1/2″ pieces. To prevent discoloration, dip into an ascorbic acid solution. | Hot Pack Only: Boil slices for 2 minutes. If processing small potatoes whole, boil for at least 10 minutes. Drain and fill jars. Add fresh boiling water, leaving 1″ headspace. | 40 | 35 |
| Peppers (including jalapenos, chilies, pimento) | If you have small peppers, you can leave them whole. You can quarter large-sized peppers. Remove the seeds and core. | Hot pack only: In each pepper, add 2-4 slashes. Either blanch in boiling water for 6-8 minutes, or blister skins by placing in a hot oven. Let cool and peel. Flatten the peppers and loosely fill jars. Add boiling water, leaving 1″ headspace. | Not recommended | 35 |
| Pumpkin and squash | Rinse, remove skin and seeds | Hot Pack Only: Boil in a saucepan for 2 minutes. Fill jars with produce and water, leaving a 1″ headspace. | 90 | 55 |
Now that you have started the journey of canning vegetables, whether using excess produce from your garden or not, we hope you are now inspired.
Here, we have only covered canning vegetables, in our coming posts we will cover fruits and high-acid foods. We will also be bringing specific recipes.
So, if there is something specific you are looking for, drop us a line. Our expert team of reviewers love nothing less than a challenge.
For more information about canning, please take a look at our best home canning equipment review page.
 Hi! I’m Sally-Anne!
It’s a shame you don’t have a donate button! I’d certainly donate to this superb
blog! I guess for now i’ll settle for bookmarking and adding your RSS feed to my Google account.
I look forward to brand new updates and will talk about this website with my
Facebook group. Chat soon!
Merely wanna comment that you have a very nice site, I enjoy the design and style it actually stands out.