Foods with high acidic content should be preserved using a water bath canner. Non-acidic and low acid fruits and vegetables and ingredients need to be processed in pressure canners for safe home preserving.
Acidic foods i.e. low pH foods, can be sweet, sour or savory and include jams, salsas, tomatoes, most fruits, and jellies. Many such pastes and condiments must be preserved using water bath canning – a safe preserving method.
You can use a water bath canner safely in the comfort of your own home. They are relatively inexpensive and easy to use. And, the best part is, you get to choose what goes into them and what you leave out – such as preservatives and additives!
If you are canning at home for the first time and don’t have a water bath canner kit, don’t worry. You can still use the steam canning method with your existing kitchen utensils and pots.
However, as a beginner, you should use reliable recipes from certified sources.
This article goes through the equipment and setup that is needed to safely can at home. We have created a step-by-step guide on how to use a water bath canner.
Quick Content Navigation
Water Bath Canning Equipment To Use
While you can buy a canning kit, this is the equipment required if you plan on using materials you already have.

Using your equipment will be cost-saving and gets the job done just right as well.
The following is a list of the basic and optional equipment required for the water bath canning method.

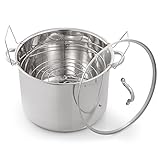


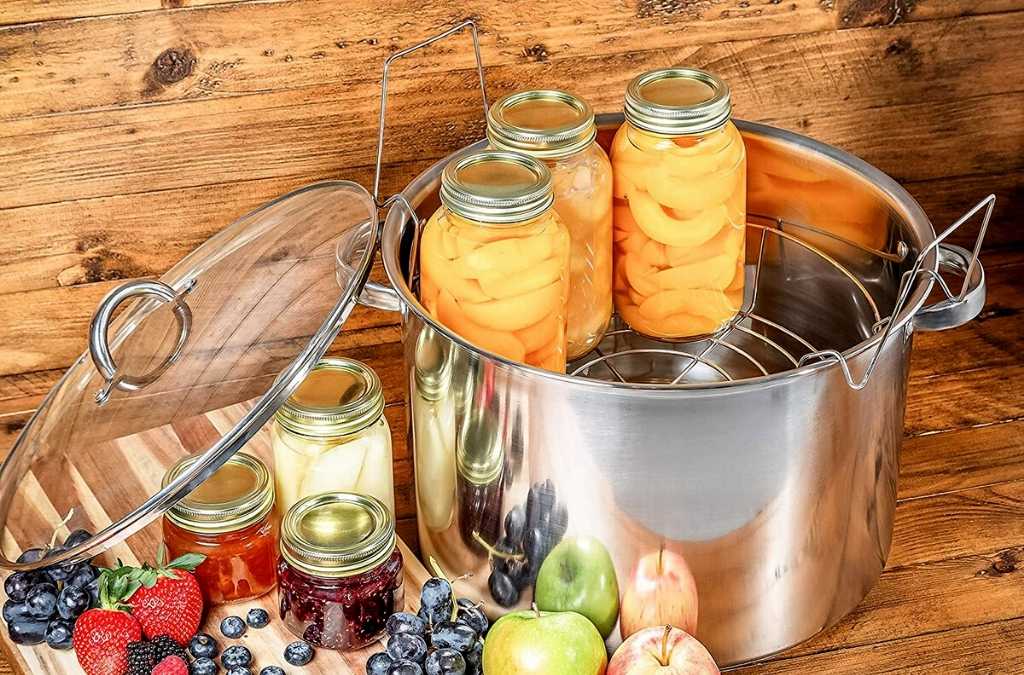
Get Your Equipment Ready For The Water Bath Canner
Step 1.
Rinse the glass jars and lids with soap and water and drain them thoroughly.
Make sure you don’t use jars that are larger than what is mentioned in the recipe – smaller ones are fine.
The trick is to make sure the water covers the jar AND the lid.
Step 2.
Fill half of the canner with water and place the cover on top. Bring to the boil and let it simmer for 10 mins at 180 degrees F.
The water should be preheated to 140 degrees F if the food is raw-packed and 180 degrees F if hot-packed.
Step 3.
Place a canning rack in the boiling water so the jars are placed properly and will not tip inside the water.
While you are heating the canner, prepare the food that is to be canned.

Step 4.
Simmer the cans and lids (do not boil them) in your water bath canner or a saucepan.
Alternatively, you can also just wash the jars in the dishwasher instead of sterilizing them.
Make sure to use new lids each time, the rings however can be reused.
Do not remove the lids from the water until they are ready for use.
Scheduling the following times will prove to be useful:
- For starters make sure to note the processing time from the recipe you are using
- The boiling time should be around 25 minutes based on the pot size and burner heat.
- Water should come to a boil for about 10 -15 minutes after the jars have been placed inside the canner
- Allow 5 minutes for the jars to rest in the canner after the heat has been turned off
Fill The Jars
Step 1.
Using a ladle, scoop the jam, jelly or salsa you have made and pour it into jars. If using fresh fruit or vegetables, pack them into the jars.
Leave about an inch of space at the top or as mentioned in the recipe.
This process is made easier if you use a wide-mouthed funnel to fill the jars.
Step 2.
Use a spatula to clean any leftover food from the rim or outside of the jar. You can also use this to get rid of any air bubbles inside the jar. However, we suggest using a proper bubble remover found in most canning kits.
Finally, clean the rim and outer edge with clean paper towel or clean kitchen cloth.
This makes sure the lid sits properly and the food is preserved properly.
Seal With Lid And Rings
Place the lid and rings and tighten until you feel some resistance
Avoid overtightening the lid, as air won’t be able to escape while canning.
Begin The Canning Process
Step 1.
Carefully place the jars into the water, and in the rack, using tongs or jar lifters. Alternatively, place the jars into the rack on th kitchen bench and load the rack into the water bath canner.
This process should be conducted with a steady hand so that the food does not touch the lids.
The jars should be submerged under about an inch of water.
Make sure the jars are placed at a distance of at least half an inch from one another to avoid jostling. This may lead to breakage of the glass!
Step 2.
Place the lid on top and let the water boil fully.
Step 3.
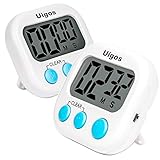
Use a timer as per the recipe instructions.
The water should be boiling gently and not too vigorously.
Add more water in the saucepan if required, but make sure the water is at boiling temperature.
This is where an electric kettle would be handy, but you can also boil water separately in another saucepan or pot.
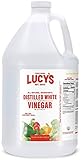
You can also add a couple of tablespoons of vinegar to prevent the jars from getting cloudy.

Cool The Jars
Step 1.
After the processing time is up, turn the heat off and allow the jars to cool for about five minutes in the canner.
Step 2.
Using a jar lifter or tongs remove the jars from the water bath canner. Place them at a distance of 2 inches from one another on a towel or cooling rack to cool.
Do not place them on a cold surface.
Let them rest and cool for about 12 to 24 hours.
Do not tighten, open or bother with the jars during this time. You might hear the lids make a popping sound, which is normal as they are being sealed by the temperature difference.
Check The Lids And Remove The Rings
Step 1.
Once the cooling time is complete, remove the rings and inspect if any lids are unsealed.
To do this, push down on the centre of the lid. If sealed properly, the lid should not move.
Step 2.
If the lid bounces, re-apply the ring and go through the boiling process again as the jar is not sealed properly. Your food will not be safe to store!
Alternatively, place those in the refrigerator and finish them first.
The seal was successful if you push the lids, and they don’t move at all.
Step 4.
Wipe and wash the jars from outside to make sure no residue is left behind from the process.
Step 5.
Label the jars for your convenience. Place them in a cool, dry place and store them for up to a year depending on the produce.
Word Of Caution And Round-Up
It is important to know the difference between water bath canning and pressure canning. Low acid foods may only be safely preserved using a pressure canner. A water bath canner is inexpensive, easy to use and fantastic for acidic foods such as tomatoes and fruits.
Make delicious and healthy homemade jams and jellies, salsas and pickles in your very own water bath canner. Remember, you may not need to buy a dedicated canner if you have a stockpot or saucepan large enough to cover the canning jars.
Also, it is vital to properly prepare the jars and lids before filling and processing them in your canner. Make sure you boil the jars for an appropriate time to remove any bacteria. This will ensure they are safe for storage and later use.
Check the lids have sealed correctly before storing. Any that did not seal properly can either be put in the refrigerator for immediate use or re-processed in the water bath canner.
Find out more preserving tips and reviews on our page, Canning Vegetables At Home: The Best Home Preserving Equipment.
 Hi! I’m Sally-Anne!
Heya! I’m at work surfing around your blog from my new apple iphone!
Just wanted to say I love reading your blog and look forward to all your posts!
Keep up the fantastic work!
Wow! Thank you! I constantly needed to write on my site something like that. Can I take a part of your post to my blog?
Thanks for taking the time to comment. We are happy for you to use a part of our post with a relevant link back to our article.