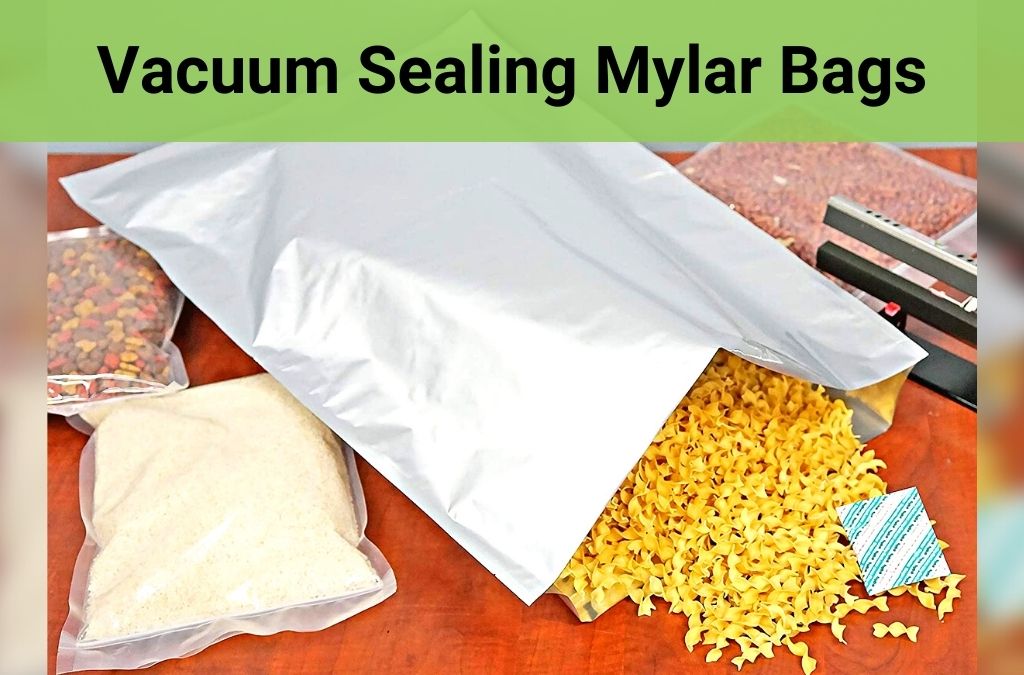
Everyone needs storage solutions for their food and vacuum sealing Mylar bags is one of the most secure methods. Mylar bags are the best long-haul stockpiling technique for dry food varieties like rice, beans, and flour.
When done effectively, some varieties of food can last more than 25 years in Mylar bags! If you are new to this technique, here is all you need to know about long-haul food stockpiling in Mylar bags.
We will go through the guidelines and advantages for vacuum sealing Mylar bags. Also, oxygen absorbers – what they are and how to use them.
Quick Content Navigation
What is Mylar?
As one man suitably said, Mylar is every prepper’s number one sort of plastic.

The business trademark for Mylar is BoPET, biaxially-orientated polyethylene terephthalate.
It was first created during the 1950s and was utilized by NASA for its Echo II Balloon.
A stretched polyester film, it is known for its chemical and dimensional stability, high tensile durability and relectivity.
In fact, this material is also a barrier to gases and smells, has electrical insulation properties and can be transparent.
Think solar filters, protective plastic coatings and even space blankets. More importantly, think mylar storage bags for long-term food storage.
What Makes Mylar Bags Ideal for Long-Term Storage?
To the extent food stockpiling goes, Mylar is phenomenal because it is:
- Durable
- Lightweight
- Reflects light
- Non-porous
- Odor barrier
- Gas barrier
- Cheap
- Easy to use
Mylar comes in a range of thicknesses from 3.5 to 7 millimeters. It stands to reason that the thicker the material, the more your food is protected. For long-term food storage, go with as thick as you can get. However, if you are just looking to store food for a couple of months the thinner Mylar bags will be fine.
Just be aware, the thicker the material, the more expensive the bags are.
You can use other materials for long-haul food storage. However, they will not be as good as Mylar, are often more costly or require a degree to work out how to use them.
Vacuum Sealing Mylar Bags
Most foods will require an oxygen absorber added for Mylar bags to work best. There are some exceptions including sugar and salt which go rock hard when sealed with an oxygen absorber.
Step 1: Preparation
It is important that you have things well set up before you start. Depending on the food type you are storing, select the size of your Mylar bag. Standard sizes are 5 gallon and 1 gallon.
1 gallon mylar bags are great for smaller foods such as, herbs & spices, dried fruit and jerky. The 5 gallon bags we use for bulkier items such as beans, rice, corn and wheat.
Please note: 5 gallon bags are not ideal to be sealed with a vacuum sealer. We suggest using a hair straightener or a hot iron and piece of timber.
You can make your own custom size bags by using a vacuum sealer.
Once you are ready to start, open the pack of Mylar bags. You need to make sure you keep the oxygen absorbers sealed until you are ready to use them.
If you expose the oxygen absorbers to the air for any length of time, it renders them useless.
Step 2: Fill Your Mylar Bags
- Use a food scoop or a funnel to fill larger bags with wheat, rice or flour to avoid spillage. We also suggest placing the large bags in a bucket or container to ensure they don’t tip over.
- Shake the bags to make sure the food particles are settled. This will remove air as you fill the bag.
- Once 1/2 full, add the appropriate number of oxygen absorbers. Usually 1 is enough for the 1 gallon bags.
- Leave a gap of around 4-5 inches from the top of the bag. This will allow you to easily vacuum seal the Mylar bags.
- Label the packs with the date and what is stored inside.
Tips
- 7.5mil Mylar bags are very sharp. Please wear gloves to avoid cutting your fingers!
- Put a piece of clear tape over your label to avoid fading.
Step 3. Create An Air Channel Device
Vacuum sealer bags are generally textured on the inside. These lumps create air channels to allow the vacuum sealer to suck the air out of the bags.
However, Mylar bags are smooth on the inside and the outside. This means that when you are vacuum sealing Mylar bags, you need to create a device to allow air to be sucked out of the bag.
We like this idea here:
Other videos and blogs use a small strip of vacuum sealer bag and this works as well.
The technique we don’t like is one where you use 2 small strips of vacuum sealer bag about 2 inches x 1 inch. You place these inside each edge of the Mylar bag. Then simply vacuum and seal.
The problem here is that part of the seal is formed by melted plastic from the regular vacuum sealer bag. For items you use regularly this is not a problem.
It is not an option for long-term food storage.
Step 4: Vacuum Sealing The Mylar Bags
If using a vacuum sealer, this is a simple process. As we have stated previously, a vacuum sealer is not really appropriate for 5 gallon Mylar bags. The truth is that they simply do not fit!
Follow the instructions of whichever vacuum sealer you are using. You need to use the vacuum function first to remove all the air.
Keep moving the food around inside the bag while this process is happening. It ensures that the bag is as flat as it can be for storage. In fact, it also means that all the air is removed.
Once the vacuum process is done, simply switch to the sealing function and Voila!! You are now an expert on vacuum sealing Mylar bags.
There are many automated vacuum sealers on the market today. These are not great when you vacuum seal Mylar bags. Our experts found that the manual sealers are much better for Mylar bags.
Step 5. Sealing 5 Gallon Mylar Bags
The best way to effectively seal large Mylar bags is with a dedicated bag sealer. Whilst not cheap, if you are looking for long-term food storage these are worth the investment.
At around $30, they easily seal Mylar bags with a strong bond that will not deteriorate over time. If you are just starting out, a hair straightener or regular clothes iron will do.
- Place your 5 gallon Mylar bag into a 5 gallon food-grade bucket.
- Fill the bag with a scoop or funnel leaving 4-5 inches at the top.
- Make sure there is no food particles or dust where you are going to seal the Mylar bag. This will weaken the seal.
- Switch your iron or straightener onto its highest setting and let it warm up.
- Seal the bag leaving 2 inches open at one end.
- Add the appropriate number of oxygen absorbers. These are cheap to buy so err on the side of caution and add more not less. Check our suppliers of oxygen absorbers.
- Squeeze as much air out of the bag as possible and seal the remaining 2 inches of the bag.
Using an Iron To Seal Mylar Bags
Have a piece of timber wrapped in a towel to use as your ironing board. Place this over the edge of your bucket and press down with the iron.
Tip: Seal as near to the top of the bag as possible to allow you to reseal again if needed.
The final step to sealing 5 gallon Mylar bags is to check the seal the next day. Your bag should look all “squished”. This means the oxygen absorbers have done their job and removed the air inside the bag.
Wrap Up Of Vacuum Sealing Mylar Bags
By now you will have seen that you can undertake vacuum sealing Mylar bags with the right equipment. It takes a little more work than sealing regular vacuum bags as you need to create an air channel. However, you can re-use your air channel device many times.
Also, we have shown you that a vacuum sealer is not the best piece of equipment for 5 gallon Mylar bags. Usually, these bags are used for long-term food storage by preppers, survivalists and homesteaders. A dedicated bag sealer is your best option, however, a hair straightener or clothes iron will suffice.
So, get yourself some good quality Mylar bags, oxygen absorbers and a top vacuum sealer. Have some labels or permanent marker handy and start vacuum sealing Mylar bags to prolong the shelf life of many foods.
Read our review of great quality, affordable vacuum sealers.
Or learn about the best electric canners.
 Hi! I’m Sally-Anne!